经管之家App
让优质教育人人可得
立即打开


测试环境如下
g5.4xlarge
EBS: 200GB
AMI:ami-0a83c884ad208dfbc ubuntu/images/hvm-ssd-gp3/ubuntu-noble-24.04-amd64-server-20250419
安装NVIDIA驱动和CUDA toolkit
查看PCIe设备
性能参数参考,https://www.nvidia.cn/data-center/products/a10-gpu/
$ lspci|grep NVIDIA
00:1e.0 3D controller: NVIDIA Corporation TU104GL [Tesla T4] (rev a1)安装NVIDIA驱动,类别为数据中心,寻找并下载12.8的CUDA驱动版本,https://www.nvidia.cn/drivers/details/242978/
sudo apt install linux-headers-$(uname -r) gcc make -y
sudo bash NVIDIA-Linux-x86_64-570.133.20.run
报错和原因,这个错误信息表明NVIDIA驱动程序安装器无法找到当前运行内核的源代码。NVIDIA的驱动程序需要内核头文件和源代码来编译与内核兼容的模块。
ERROR: Unable to find the kernel source tree for the currently running kernel. Please make sure you have installed the kernel source files for your kernel and that they are properly configured; on Red Hat Linux systems, for example, be sure you have the 'kernel-source' or 'kernel-devel' RPM installed. If you know the correct kernel source files are installed, you may specify the kernel source path with the '--kernel-source-path' command line option.
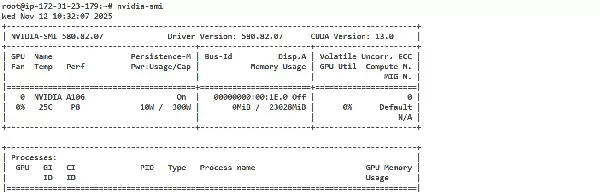
ERROR: Installation has failed. Please see the file '/var/log/nvidia-installer.log' for details. You may find suggestions on fixing installation problems in the README available on the Linux driver download page at www.nvidia.com.查看安装成功,单卡P8显存23GB
安装CUDA toolkit,使用同样的版本,https://developer.nvidia.com/cuda-downloads?target_os=Linux&target_arch=x86_64&Distribution=Ubuntu&target_version=24.04&target_type=runfile_local
wget https://developer.download.nvidia.com/compute/cuda/12.8.1/local_installers/cuda_12.8.1_570.124.06_linux.run
sudo sh cuda_12.8.1_570.124.06_linux.run
安装过程会自动使用make -j x来利用所有CPU编译,日志可以查看报错或结束提示
$ cat /var/log/cuda-installer.log
...
[INFO]: Finished with code: 36096
[ERROR]: 安装驱动组件失败。请参阅/var/log/nvidia-installer.log以获取更多详细信息。
# 持续报错编译错误,可能是内核版本不兼容
/tmp/selfgz35754/NVIDIA-Linux-x86_64-570.124.06/kernel-open/nvidia/nv-mmap.c:321:5: warning: conflicting types for 'nv_encode_caching' due to enum/integer mismatch; have 'int(pgprot_t *, NvU32,  nv_memory_type_t)' {aka 'int(struct pgprot *, unsigned int,  nv_memory_type_t)'} [-Wenum-int-mismatch]
编译CUDA toolkit一直报错,参考文档
直接使用apt安装,这也体现了Docker容器的优势,内置了CUDA toolkit
$ sudo apt install nvidia-cuda-toolkit添加PATH,非常重要否则后续会出现找不到.so文件的错误。通过apt install就不需要手动添加了
export PATH=/usr/local/cuda-12.x/bin:$PATH
export LD_LIBRARY_PATH=/usr/local/cuda-12.x/lib64:$LD_LIBRARY_PATH
查看安装成功
$ nvcc --version
nvcc: NVIDIA (R) Cuda compiler driver
Copyright (c) 2005-2023 NVIDIA Corporation
Built on Fri_Jan__6_16:45:21_PST_2023
Cuda compilation tools, release 12.0, V12.0.140
Build cuda_12.0.r12.0/compiler.32267302_0
以上两个步骤需要编译,需要一定时间,尽量选择较新版本的CUDA
由于后续需要使用Docker运行模型,因此添加容器运行时支持,直接参考文档安装即可
sudo apt-get install -y nvidia-container-toolkit镜像的选择和配置
在ModelScope中将模型加载到S3中的路径为
Qwen3-VL-2B-Instructs3://bucketname/Qwen/Qwen3-VL-2B-Instruct/参考Qwen3 VL官方文档(https://github.com/QwenLM/Qwen3-VL),要求使用的transformers版本大于4.57.0,建议使用vllm版本0.11
The Qwen3-VL model requires transformers >= 4.57.0
We recommend using vLLM for fast Qwen3-VL deployment and inference. You need to install the following to enable Qwen3-VL support.
vllm>=0.11.0考虑到环境的隔离性,使用镜像来完成模型的部署。
Qwen官方镜像:qwenllm/qwenvl:qwen3vl-cu128
公开的vllm0.11版本镜像:public.ecr.aws/deep-learning-containers/vllm:0.11-gpu-py312
在实际拉取过程中会发现这两个镜像大部分的图层都是相同的。
其中Qwen官方镜像并没有入口命令可以用于调试。公开的public ECR镜像vllm:0.11-gpu-py312的入口为vLLM官方的Sagemaker入口脚本,内容如下,主要是为了兼容Sagemaker服务的配置。
# /usr/local/bin/sagemaker_entrypoint.sh
bash /usr/local/bin/bash_telemetry.sh >/dev/null 2>&1 || true
PREFIX="SM_VLLM_" ARG_PREFIX="--" ARGS=(--port 8080) while IFS='=' read -r key value; do arg_name=$(echo "${key#"${PREFIX}"}" | tr '[:upper:]' '[:lower:]' | tr '_' '-') ARGS+=("${ARG_PREFIX}${arg_name}") if [ -n "$value" ]; then ARGS+=("$value") fi done < <(env | grep "^${PREFIX}") exec python3 -m vllm.entrypoints.openai.api_server "${ARGS[@]}"
使用如下命令启动容器,将模型挂载到容器中
docker run --gpus all --ipc=host --network=host --rm --name qwen3vl \
-v /root/model/:/model -it qwenllm/qwenvl:qwen3vl-cu128 bash
此外Qwen官方镜像中已经内置了如下依赖,不需要额外安装。为了支持流式加载模型,修改为vllm[runai]
# 安装需求
pip install accelerate
pip install qwen-vl-utils==0.0.14
# pip install -U vllm
pip install -U vllm[runai]
启动vllm引擎,由于默认的设置
--max-model-len--enable-expert-parallelvllm serve /model/Qwen3-VL-2B-Instruct \
--load-format runai_streamer \
--tensor-parallel-size 1 \
--mm-encoder-tp-mode data \
--async-scheduling \
--media-io-kwargs '{"video": {"num_frames": -1}}' \
--host 0.0.0.0 \
--port 8000 \
--max-model-len 8945
列出模型
$ curl 127.0.0.1:8000/v1/models
{"object":"list","data":[{"id":"/model/Qwen3-VL-2B-Instruct","object":"model","created":1762944040,"owned_by":"vllm","root":"/model/Qwen3-VL-2B-Instruct","parent":null,"max_model_len":8945,"permission":[{"id":"modelperm-3310ed85128d425793b2c15bb5cb3d79","object":"model_permission","created":1762944040,"allow_create_engine":false,"allow_sampling":true,"allow_logprobs":true,"allow_search_indices":false,"allow_view":true,"allow_fine_tuning":false,"organization":"*","group":null,"is_blocking":false}]}]}
尝试调用
curl http://127.0.0.1:8000/v1/chat/completions \
-H "Content-Type: application/json" \
-H "Authorization: Bearer EMPTY" \
-d '{
"model": "/model/Qwen3-VL-2B-Instruct",
"messages": [
{
"role": "user",
"content": [
{
"type": "image_url",
"image_url": {
"url": "https://n.sinaimg.cn/sinacn19/0/w2000h2000/20180618/d876-heauxvz1345994.jpg"
}
},
{
"type": "text",
"text": "帮我解读一下"
}
]
}
],
"max_tokens": 1024
}'
查看结果
视频推理出现如下报错,表明超出了
--max-model-len{"error":{"message":"The decoder prompt (length 13642) is longer than the maximum model length of 8945. Make sure that `max_model_len` is no smaller than the number of text tokens plus multimodal tokens. For image inputs, the number of image tokens depends on the number of images, and possibly their aspect ratios as well.","type":"BadRequestError","param":null,"code":400}}对于公开镜像
public.ecr.aws/deep-learning-containers/vllm:0.11-gpu-py312serviceAccountSM_VLLMapiVersion: apps/v1
kind: Deployment
metadata:
name: vllm-openai-qwen3-vl
namespace: aitao
labels:
app: vllm-openai
spec:
replicas: 1
selector:
matchLabels:
app: vllm-openai
template:
metadata:
labels:
app: vllm-openai
spec:
serviceAccount: sa-service-account-api
nodeSelector:
eks.amazonaws.com/nodegroup: llm-ng
containers:
- name: vllm-openai-container
image: public.ecr.aws/deep-learning-containers/vllm:0.11-gpu-py312
env:
- name: REGION
value: cn-northwest-1
- name: SM_VLLM_MODEL
value: s3://bucketname/Qwen/Qwen3-VL-2B-Instruct
- name: SM_VLLM_MAX_MODEL_LEN
value: "24896"
- name: SM_VLLM_GPU_MEMORY_UTILIZATION
value: "0.9"
- name: SM_VLLM_PORT
value: "8000"
- name: SM_VLLM_TENSOR_PARALLEL_SIZE
value: "2"
- name: SM_VLLM_LOAD_FORMAT
value: runai_streamer
- name: SM_VLLM_SERVED_MODEL_NAME
value: Qwen3-VL
- name: SM_VLLM_MAX_NUM_SEQS
value: "1024"
- name: AWS_DEFAULT_REGION
value: cn-northwest-1
ports:
- containerPort: 8000
name: http-api
resources:
limits:
nvidia.com/gpu: 1
memory: "16Gi"
cpu: "4"
requests:
nvidia.com/gpu: 1
memory: "16Gi"
cpu: "4"
restartPolicy: Always

报错信息:
(APIServer pid=1) OSError: Can't load the configuration of 's3://bucketname/Qwen/Qwen3-VL-2B-Instruct/'. If you were trying to load it from 'https://huggingface.co/models', ensure you don't have a local directory with the same name. Otherwise, make sure 's3://bucketname/Qwen/Qwen3-VL-2B-Instruct/' is the correct path to a directory containing a config.json file.

推测是公开镜像中没有runai插件和相关依赖,使用如下Dockerfile打包并上传到ECR仓库中:
FROM public.ecr.aws/deep-learning-containers/vllm:0.11-gpu-py312
# 设置Python源
RUN pip config set global.index-url https://mirrors.aliyun.com/pypi/simple/
# 安装所需依赖
RUN pip install accelerate \
&& pip install qwen-vl-utils==0.0.14 \
&& uv pip install -U vllm[runai]

再次部署:
containers:
- name: vllm-openai-container
image: xxxxxxxxx.dkr.ecr.cn-north-1.amazonaws.com.cn/zhaojiew/vllm-sagemaker:latest

启动参数为:
python3 -m vllm.entrypoints.openai.api_server --port 8000 --max-model-len 8896 --port 8000 --load-format runai_streamer --tensor-parallel-size 1 --gpu-memory-utilization 0.9 --model s3://bucketname/Qwen/Qwen3-VL-2B-Instruct --served-model-name Qwen3-V

没有出现问题,查看了一些类似的issue,发现可能是vLLM的0.11版本存在问题,
issue链接
When trying to use Run.AI model streamer on vLLM 0.11 it breaks.
It seems to break with every new minor release of vLLM, the same thing happened previously from 0.9.x to 0.10.x.
vllm serve s3://<path> --load-format runai_streamer
Repo id must be in the form 'repo_name' or 'namespace/repo_name': 's3://XXXXXXXXX'. Use `repo_type` argument if neededpython3 -m vllm.entrypoints.openai.api_server --max-model-len 8896 --port 8000 --max-num-seqs 1024 --load-format runai_streamer --tensor-parallel-size 1 --gpu-memory-utilization 0.9 --model /model/Qwen3-VL-2B-Instruct --served-model-name Qwen3-VL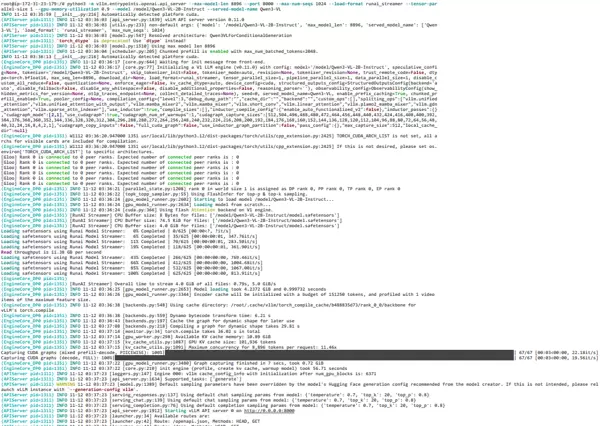

 扫码加好友,拉您进群
 全部版块
全部版块 我的主页
我的主页

 收藏
收藏


